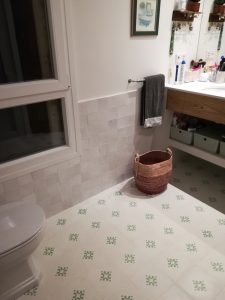
Discover the secrets of grout for zellige and transform your spaces with the charm of Moroccan tiles. Choosing the right grout not only protects your investment but also brings out the unique beauty of each piece. This guide covers the colours, techniques and care that will keep your zellige looking its best.
Why choosing the right grout for your zellige matters
Choosing the right grout is essential to both the upkeep and the appearance of your zellige. A good-quality grout protects against moisture and wear, and it also brings out the natural beauty of these handmade tiles. The right grout has a direct bearing on how long your design will last.
Think of grout as the canvas that lets your zellige shine, bringing out its unique shades and textures. Choosing the right one can make the difference between a finish that captivates and one that goes unnoticed, and it is what allows your zellige to take centre stage in the room.
Types of grout and how they affect Moroccan tiles
Before choosing, it is important to understand how each type of grout affects the appearance and durability of zellige. Because they are porous, cement-based grouts can let the tile breathe properly and prevent moisture from building up. However, the wrong choice could lead to wear or discolouration.
Epoxy grouts, on the other hand, form a waterproof barrier that protects against stains and moisture. Although they are harder to apply, their strength makes them a reliable ally in preserving the vibrant character of zellige. The choice between these types, and their colour variations, can enhance or diminish the visual harmony of the mosaic.
Seeing grout not just as a filler but as an element in dialogue with the tile is the key to a finish that does justice to the richness of Moroccan zellige.
Grout colours: combinations and contrasts with zellige
Choosing the right grout colour is essential to bring out the unique beauty of zellige. A white or neutral grout can unify a multicoloured zellige wall, emphasising its mosaic of shades. A dark or contrasting grout, by contrast, outlines each piece, adding depth and visual drama to the design.
Consider the atmosphere you want to create. A grout in warm tones can bring a cosy feel, while a cool one adds a modern touch. The key is colour harmony, which should complement both the zellige and the surrounding space.
Grouting techniques for zellige
Before you start, make sure the zellige is clean and free of dust. Apply the grout with a rubber float, spreading it diagonally across the tiles. This ensures that the gaps between them are filled evenly.
Once it is applied, wait a few minutes for the grout to start to set. Then gently wipe off the excess with a damp sponge, using circular movements. This helps bring out the unique sheen of zellige without leaving any residue.
Finally, go over the tiles lightly with a dry cloth to polish them. This is when your zellige starts to gleam, bringing the essence of Morocco into your space.
Common zellige grouting mistakes and how to avoid them
When grouting zellige, it is crucial to avoid applying too much. As in any detailed craft, less is more. Too much grout not only wastes material but can also fill in the characteristic relief of the zellige surface, taking away the unique texture you want to show off.
To prevent this, use a rubber float and press gently, spreading the grout evenly. The technique is to work at an oblique angle, so that the grout gets into the gaps without building up. This precision protects the appearance of your tiles and also ensures outstanding longevity.
Tools and tips for a perfect application
To ensure a flawless application of grout on your zellige tiles, choosing the right tool is essential. A rubber float is indispensable, as it spreads the grout evenly and avoids the excess that could dull the natural charm of zellige.
Also make sure you have a damp sponge to hand to gently wipe off any excess grout. This brings out the unique beauty of each piece and prevents a cloudy film from forming on the ceramic.
Lastly, patience is your ally. Apply the grout with smooth, steady movements, so that the distinctive pattern of the zellige shines through the care you put into the work.
Caring for zellige after grouting
Once the grout is in place, it is crucial to prevent moisture from building up on your zellige. Excess water can stain or wear the surface. To preserve its unique charm, clean the tiles with a soft cloth and make sure you dry them well after each use.
Also protect the joints against ingrained dirt by regularly applying a sealer designed for grout. This step will keep the zellige looking immaculate and also make everyday cleaning easier.
Remember: the right care after grouting is what keeps your zellige beautiful over time.
Cleaning and protecting grouted zellige
To ensure the longevity of zellige, proper cleaning after grouting is crucial. Start with a soft, damp cloth to remove any surface residue. Avoid acidic products, which can damage the glazed surface.
Once it is clean, apply a good-quality sealer designed for zellige, forming a protective barrier that will make future cleaning easier and enhance its natural sheen.
Renewing the grout: when and how
Knowing the right time to renew the grout is key to caring for your zellige. Look out for signs such as discolouration or wear, which usually mean a touch-up is needed. A yearly inspection is generally recommended, although this can vary depending on how the tiles are used and where they are.
The process starts with cleaning the surface and removing the old grout. With suitable tools and plenty of patience, it is raked out carefully so as not to damage the zellige. The new grout is then applied, spread with a rubber float and worked well into the joints.
Finally, wipe off the excess with a damp sponge, moving it diagonally across the tiles. This process not only protects your zellige but also refreshes its appearance, bringing out the rich texture and colour that characterise it.
Thank you for reading. Keep exploring with Demosaica for more stories and advice in our upcoming articles.