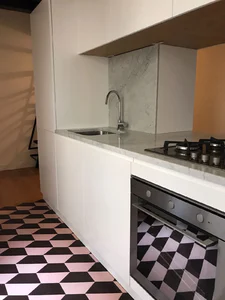
A cement tile kitchen floor is laid with tiles of pigmented cement, cold-pressed and cured without firing: the pattern is part of the material, not a print on the surface. It works in a kitchen for three reasons: it marks out the work area without partition walls, individual tiles can be replaced, and the colour does not wear off with use because it is in the mortar itself.
Three decisions shape the result: which format you choose, where you put the pattern and how you protect the floor from grease. We take them one by one, with the figures for our cement tile formats and photos of real cement tile kitchen floors in Seville, Cádiz, Zafra, France, Belgium, Portugal, Germany and Finland.
Why do cement tiles work in a kitchen?
Because they solve two problems at once: they provide the one decorative feature in a room full of units and appliances, and they define zones in open-plan kitchens without putting up a partition wall. And because the pattern is made of coloured mortars on the face of the tile, wear does not rub it away.
It is not a zero-maintenance material: cement is porous, so it has to be treated with a water-repellent before grouting, and the treatment needs renewing over the years. A printed porcelain tile spares you that care, but it lacks the texture and the option of designing your own pattern that the designs in our cement tile catalogue offer.

Which tile format should you choose for the size of your kitchen?
The smaller the kitchen, the smaller the pattern repeat should be. Below 8 or 10 m², the 20 × 20 cm format reads well; in large, open-plan kitchens, the 25 × 25 cm and the 30 × 20 cm hexagon bring more order to the floor.
Formats, weight per tile and tiles per m²:
| Format | Ref. | Size | Weight per tile | Tiles per m² |
|---|---|---|---|---|
| Square | H02 | 25 × 25 × 1.8 cm | 2.30 kg | 16 |
| Square | H03 | 20 × 20 × 1.5 cm | 1.30 kg | 25 |
| Square | H04 | 15 × 15 × 1.5 cm | 0.79 kg | 45 |
| Square | H06 | 10 × 10 × 1.5 cm | 0.35 kg | 100 |
| Rectangular | H11 | 30 × 15 × 1.6 cm | 1.45 kg | 23 |
| Rectangular | H13 | 20 × 10 × 1.5 cm | 0.62 kg | 50 |
| Hexagonal | H21 | 30 × 20 × 1.7 cm | 1.62 kg | 21 |
| Hexagonal | H22 | 23 × 20 × 1.5 cm | 1.16 kg | 29 |
| Chakar | H61 | 20 × 17 × 1.5 cm | 0.58 kg | 50 |
| Tile insert | H07 | 7 × 7 × 1.5 cm | 0.25 kg | 205 |
| Plain skirting | HR01 | 20 × 10 × 1.5 cm | 0.66 kg | 5 per linear metre |
Weight matters on an old floor structure: 25 H03 tiles come to 32.5 kg per m².
How do you combine a cement tile floor with a white kitchen?
With white units, the floor does all the talking: you can afford the busiest pattern in the catalogue. The rule that almost never fails: repeat two or three of the tile’s colours in the units or the splashback, and keep everything else neutral.
In a modern kitchen in Brussels, Mod. 133-B was laid in off-white (MC3) and two greys (MC46 and MC48), with white metro tiles on the splashback and grey units: it feels almost like a professional kitchen.

At the opposite extreme is a house in Zafra: the open-plan kitchen has Mod. 323, a floral design with geometric touches in white (MC1), yellow (MC18), red (MC23), grey (MC42) and navy blue (MC44), set against white and wood units. It was a custom design, which added production time.

The same balance can tame a complex pattern, too: for a kitchen and a bathroom in Australia, a customer ordered Mod. 156, a contemporary design that is anything but simple, in white (MC1), greys (MC47 and MC48) and black (MC49). For a Nordic look, white metro tiles and an understated cement tile such as Mod. 196 are all you need; for a minimalist one, large-format plain tiles in a neutral shade (MC1, MC45 or MC46).
The MC1–MC49 colour chart shows the difference: switching the background from white (MC1) to off-white (MC3) changes how warm the kitchen feels.
Can you create a cement tile rug under the island or the table?
Yes, and it is the most widely used idea in kitchens: a patterned rectangle framed by a border, with the rest of the floor in plain tiles. It marks out the island or dining area and is set out to measure.
How to plan it, in order:
- Measure the actual space: the rectangle clear of base units, with the island or table centred.
- Choose the design for the inside and the plain tile for the surrounding floor: in a kitchen in Frankfurt, the floral Mod. 175 (MC3, MC12, MC21 and MC46) on plain Mod. 100 in MC46.
- Decide on the border and how it runs round the rug: there, the rug was edged with the Victorian Mod. 6 border in the same colours, which was later repeated in the hallway.
- Count the tiles using the table above, separating the inside, the border and the plain surround, and allow 5–10 % extra for cuts.
- Dry-lay the tiles first: with patterns that only come together over a group of four tiles, being one row out ruins the motif.
- Apply the water-repellent before grouting, never after.

The chequerboard is the understated version of the same idea: alternating plain and patterned tiles. Our classic suggestion intersperses Mod. 100 in off-white (MC3) with Mod. 136 in off-white and greens (MC9 and MC12), with a Mod. 9 border and matching skirting.

In a small kitchen in the city of Seville, the idea was repeated with two stock designs: plain Mod. 100 in white (MC1) and a geometric rug in Mod. 123-C in turquoise (MC6), to match the units. There are more variations in our article on cement tile rugs.

What works in small kitchens and in open-plan kitchens?
In small kitchens, choose a pattern with a short repeat that forms a motif across several tiles: the eye reads a continuous fabric, not a grid of separate tiles. In open-plan kitchens, pattern is used the other way round: as the boundary between kitchen and living room.
La Parra Ltd., our distributor in Finland, sent us photos of a small kitchen with Mod. 198-B in greys (MC41 and MC44) and blues (MC36 and MC39), laid on the back wall rather than the floor. The pattern comes together over groups of four tiles, so the wall reads as one continuous surface and gains depth.

For an open-plan kitchen, the best example is a home in Faro: Mod. 123-A in white (MC1) and black (MC49) covers the kitchen and the entrance, and meets the living room’s wooden floor in a clean joint.

Two more solutions for medium-sized kitchens: Mod. 106, a geometric design with a classic feel by our designer Yela Álvarez, in white (MC1) and blue (MC39); and Mod. 308-A in white (MC1) and turquoise (MC6). Our cement tile designs in stock leave the warehouse with no production lead time; a custom design adds one, so it is best to confirm it with the workshop.

Cement tiles or zellige for the kitchen splashback?
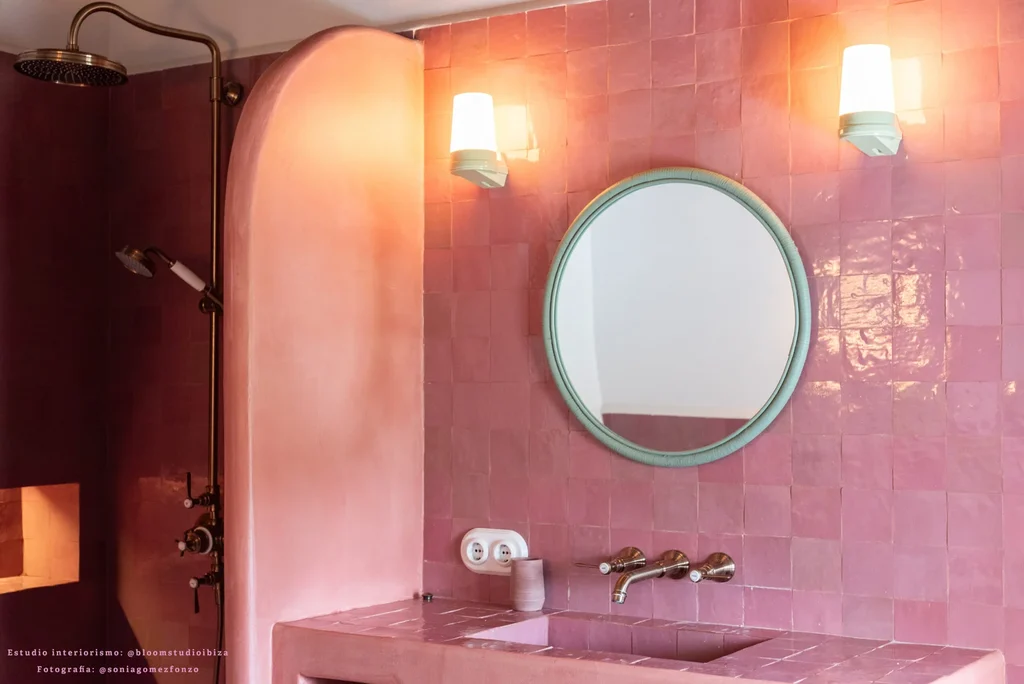
For the splashback, between the hob and the cooker hood, zellige has the edge: it is glazed ceramic, the vitrified surface wipes clean with a cloth and its uneven sheen reflects light. Cement tiles do better on the floor or on sections of wall away from the hob.
Even so, it can be done: a customer in France created a chequerboard splashback with two stock designs, Mod. 104-B and Mod. 139. They share the off-white (MC3) and the grey (MC42), and their own colours — red (MC23) and navy blue (MC44) — cover such small areas that they don’t clash.

With zellige, the format matters as much as the colour: the 15 × 5 cm Bejemat (ref. ZS15) takes 134 tiles per m² and gives an elongated layout like handmade metro tiles; the 10 × 10 cm Mjeddij comes to 100 tiles per m² and looks calmer. Every tile is different because each one is cut by hand.
The third option is the rustic kitchen: a fired-clay terracotta floor with a cement tile border on the wall. That was the approach in the kitchen of the Mrs. Dobson house in France, one of our projects: natural materials and neutral colours.

Are cement tile floors slippery? How much water do they absorb?
No, and it is one of the most persistent myths. Our 20 × 20 cm hydraulic terrazzo achieved an Rd (PTV) of 59.5 in the wet pendulum test at 20 °C: class 3, the top of the scale in the Spanish Building Code (CTE) and the class required outdoors, in swimming pools and in showers.
| Property tested | Result | Method and test report |
|---|---|---|
| Slip resistance (hydraulic terrazzo 20 × 20 cm) | Rd 59.5 → class 3 (individual values 55–60) | UNE 41901:2017 EX · test report no. 4718 |
| Water absorption (hydraulic terrazzo 20 × 20 cm) | 5.9 – 6.2 % | UNE-EN 13748-1 · test report no. 4718 |
| Cement tile 200 × 200 × 15 mm | Tested as a concrete paving tile | UNE-EN 1339:2004 · test report no. 9102 |
| Water absorption (glazed zellige 10 × 10 cm) | 15.7 % | UNE-EN ISO 10545-3 · test report no. 9103 |
| Water absorption (terracotta 15 × 5 cm) | 16.9 % | UNE-EN ISO 10545-3 · test report no. 7539 |
Two caveats before comparing with porcelain tiles: porcelain stoneware absorbs less than 0.5 %, so none of these figures is low and all of these materials need a water-repellent; and cement tiles and terrazzo are concrete tiles (UNE-EN 1339, the Spanish version of EN 1339), whereas zellige and terracotta are ceramics (UNE-EN ISO 10545), so their figures are not comparable.
We publish the full laboratory test reports unabridged, with number, date and signature, so that you can present them to the architect or site supervisor. The pendulum test report covers the 20 × 20 cm hydraulic terrazzo; if you need a test on another format or design, we can arrange it.
How do you protect and clean a cement tile kitchen floor?
The correct order is: lay the tiles, leave them to dry, apply the water-repellent and only then grout. That is what stops oil and the pigments in the grout from lodging in the pores of the cement.
The mistakes we see most often in kitchens:
- Grouting without treating the tiles first. The tile absorbs the pigment and the pattern looks hazy; it is the hardest mistake to put right. Our guide to grout for cement tile floors explains how to choose it.
- Cleaning with acids or bleach. Acids attack cement: harsh degreasers and muriatic acid are its enemies. Use water and neutral soap.
- A large pattern in a five-square-metre kitchen. The motif is cut off by the units and never reads as a whole.
- Forgetting the skirting. The point where the floor meets the units gets wet every day, and the same material holds up better than paint.
- Not keeping spare tiles. With a made-to-order design, replacing tiles later means a new production run.
The rest is routine: sweep, mop with neutral soap and renew the treatment when the floor starts to absorb water instead of repelling it. The process is explained in our cement tile floor maintenance tips.
Frequently asked questions about cement tile kitchen floors
Does cooking oil stain a cement tile floor?
It can if the floor is unprotected, because cement is porous. With the water-repellent applied before grouting and renewed over the years, oil stays on the surface and comes off with neutral soap. Act quickly: a stain that has been there for weeks already calls for a specialist product.
Can cement tiles be laid over underfloor heating in a kitchen?
Yes, they are compatible, and the mass of the tiles stores heat and releases it steadily. The timings must be respected: full curing of the screed, a gradual start-up and an adhesive suitable for underfloor heating. Switching the heating on at full power under newly laid tiles causes cracking.
Which is better in a kitchen: real cement tiles or cement-look porcelain?
It depends on your priorities. Porcelain tile absorbs less than 0.5 %, needs no water-repellent and usually works out cheaper. Cement tiles offer real texture, a deep matt finish, the option of designing your own pattern in the 49 colours of the chart, and tile-by-tile repairs.
How many tiles do I need for my kitchen floor?
Multiply the usable floor area in square metres by the number of tiles per m² for the format: 25 for the 20 × 20 cm, 16 for the 25 × 25 cm and 21 for the 30 × 20 cm hexagon. Add 5–10 % for cuts and allow 5 skirting tiles per linear metre.
Can a cement tile floor be combined with parquet in an open-plan kitchen?
Yes, and it is one of the solutions that work best in open-plan layouts: cement tiles in the kitchen and circulation areas, wood in the living room. Handle the junction with a trim or a straight joint and keep both floors at the same level, as in the home in Faro.
Can cement tiles be used on the splashback or the kitchen wall?
Yes. We have projects with cement tiles on the back wall, such as the kitchen in Finland with Mod. 198-B, and full chequerboard splashbacks. The only thing we ask: avoid the section of wall directly behind the hob, where hot grease takes the heaviest toll.
The next step is to see the material in your own hands: colours on a screen are not the colours you will see in the light of your kitchen. Write to us with the measurements and a photo of your units, ask for samples and book a visit to our showroom in Seville through the contact page.