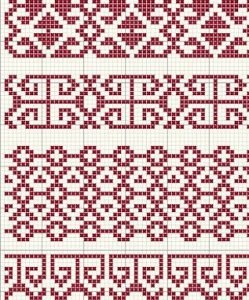
A cement tile rug is a composition of tiles set into the floor to create a decorative rectangle, just like a textile rug but built in. It is made up of a central field with a repeated design, a border that frames it and, in many cases, corner pieces. It is used to define areas in kitchens, living rooms, entrance halls and bathrooms without putting up a single partition wall.
The difference between a rug that works and one that ends up off-centre lies not in the design but in the setting-out: it is worked out on paper, counting whole tiles.
What are the parts of a cement tile rug?
Four elements, ordered separately and put together on site. A cement tile rug does not exist as a ready-made product: it is a layout of individual pieces.
- Central field. The design repeated inside the border: it is what you read from a distance and what sets the style.
- Border. The perimeter strip that closes off the field and separates it from the rest of the floor. Cement tile borders are pieces with their own pattern, not cut-down tiles.
- Corner pieces. They take the border round the corner. If the pattern is directional and there are no corner pieces, the corner gives itself away.
- Background floor. Whatever surrounds the rug: plain cement tiles, terrazzo, terracotta, microcement or wood. The more neutral it is, the more the rug stands out.
A cement tile skirting to match the border is often added, especially in bathrooms and living rooms. When the field is an interlaced geometric pattern reminiscent of al-Andalus, in the workshop we call it a Mudéjar rug.
A real cement tile rug or a vinyl rug that imitates one?
If you want to be able to take it up and you are not planning any building work, your option is printed vinyl. If you want it to be part of the floor and last as long as the house, it has to be real cement tiles. They share a look, but they are not the same product, nor are they comparable in price.
| Criterion | Cement tile rug | Imitation vinyl rug | Textile rug |
|---|---|---|---|
| Installation | With adhesive, as part of the floor | Laid on top of the floor, no building work | Laid on top of the floor |
| Thickness | 1.5 to 1.8 cm depending on format | A few millimetres | A few millimetres |
| Can it be removed? | No: it has to be broken up | Yes, at any time | Yes |
| Design | Your own design, colours and layout | Printed from a catalogue | From a catalogue |
| Maintenance | Sweeping, neutral soap and regular water-repellent treatment | Ordinary mopping; it is a consumable | Vacuuming and washing |
| Repair | Tile by tile, if you keep spares | Replaced as a whole | Replaced as a whole |
A clarification that will save you some disappointment: self-adhesive cement tiles do not exist; what is sold as peel-and-stick cement tiles is printed vinyl. A real cement tile is a concrete piece pressed in a mould and hardened as the cement sets, without firing, with the pattern formed by a layer of pigmented cement paste several millimetres thick: that is why it does not wear off with use.
How do you work out the size of a cement tile rug?
It is measured in whole tiles, not in metres. You choose a format, decide how many rows and columns you want and multiply: that way the field closes up without any cut tiles. Starting from “I want a rug two metres by three” leads to a pattern that is chopped off at the edge.
| Format | Ref. | Size | Weight per tile | Tiles per m² | Example of a field with no cuts |
|---|---|---|---|---|---|
| Square | H02 | 25 × 25 × 1.8 cm | 2.30 kg | 16 | 8 × 12 tiles = 2.00 × 3.00 m |
| Square | H03 | 20 × 20 × 1.5 cm | 1.30 kg | 25 | 8 × 12 tiles = 1.60 × 2.40 m |
| Square | H04 | 15 × 15 × 1.5 cm | 0.79 kg | 45 | 10 × 16 tiles = 1.50 × 2.40 m |
| Square | H06 | 10 × 10 × 1.5 cm | 0.35 kg | 100 | 15 × 20 tiles = 1.50 × 2.00 m |
| Rectangular | H11 | 30 × 15 × 1.6 cm | 1.45 kg | 23 | 8 × 16 tiles = 2.40 × 2.40 m |
| Rectangular | H13 | 20 × 10 × 1.5 cm | 0.62 kg | 50 | 9 × 20 tiles = 1.80 × 2.00 m |
| Hexagonal | H22 | 23 × 20 × 1.5 cm | 1.16 kg | 29 | Jagged edge: needs cutting or a straight finishing border |
| Tile insert | H07 | 7 × 7 × 1.5 cm | 0.25 kg | 205 | Insert piece: does not form a field on its own |
The full list, including octagonal tiles, skirting and special pieces, is on the cement tile formats page. Formats that interlock into a continuous pattern, such as the 20 × 17 cm Chakar cement tile, make beautiful rugs but never close into a rectangle on their own: they need a straight border to finish off the perimeter.
Three checks before you order:
- The field. Rows × columns × tile size. A rug of 8 × 12 tiles in the H03 format measures 1.60 × 2.40 m: that is 96 tiles, weighing around 125 kg in material alone.
- The border. Measure it in whole modules per side as well, and set aside the four corners. With a 20 cm module, exactly eight fit along a 1.60 m side.
- The surplus. Allow around 10 % extra for cuts and breakages, and keep spare tiles from the same batch: the colour of a new batch is never identical.

Which designs and colours work best in a cement tile rug?
Those that read well from a distance: two or three colours at most and a clear contrast with the surrounding floor. A pattern that flows from tile to tile really comes into its own as a rug; one that is self-contained within each tile works better over large areas.
Colours are chosen from the MC1 to MC49 colour chart; in plain tiles, the variation in shade from one piece to the next is more noticeable, because there is no pattern to disguise it. Our guide to cement tile patterns will help you decide on the design. These two compositions are real suggestions from our workshop.
Mudéjar rug for a bathroom: Mod. 320 in white and blue
An interlaced pattern in MC1 white and MC35 blue, with cement tile skirting in the same blue. The choice of light colours is no accident: in a small bathroom a dark rug eats up space, while blue on white brings light and freshness without closing the room in.


You will find more combinations in our article on how to decorate a bathroom with cement tiles.
Geometric rug for a living room: Mod. 264 with C16 border
It began as a custom order from one of our distributors: a field of Mod. 264 in MC1 white and MC47 grey, a Mod. C16 border and matching skirting. It is designed for living rooms in neutral tones, where the grey acts as a bridge between the floor and the soft furnishings.


This design brings out the detail that spoils more compositions than any other: for the pattern to be continuous, the orientation of each row of tiles has to change. If they are all laid the same way, the pattern breaks at every joint and the design never emerges. That is why the layout sheet must be on site.

Orders with off-catalogue designs or colours are made piece by piece and take several weeks. Check the exact lead time with the workshop before fixing dates for the building work.
Which rooms suit a cement tile rug?
Any room with an area that has its own function within a larger space: a cement tile rug draws boundaries where there are no walls.
- Open-plan kitchen. Under the island or the cooking area: it marks out the kitchen within the living space and concentrates the wear on the hardest-wearing material.
- Entrance hall. The first few metres inside the door work as a built-in doormat.
- Living room. Under the table or in front of the sofa, surrounded by wood or a plain floor: the most rewarding use, and the most demanding to set out.
- Bathroom. In front of the washbasin or covering the whole dry area, usually with matching skirting.
- Corridor. A continuous strip with a border on both sides makes the corridor feel longer.

How do you lay a cement tile rug, step by step?
Like any cement tile floor, but with two extra precautions: the setting-out takes precedence over everything else, and the junction with the adjoining floor has to be resolved.
- Dry-lay it first. Lay out the whole rug without adhesive, with its border and corners, and check the pattern, the orientation of the rows and the centring.
- Mark the centre lines. Draw the two centre lines on the substrate and lay from the middle outwards. Starting from a wall is what pushes the pattern off-centre.
- Prepare the substrate. Clean, dry, sound and level. If the rug sits next to wood or a thinner porcelain tile, sort out the floor level at this stage: the tile is 1.5 to 1.8 cm thick, plus the adhesive.
- Treat the tiles before laying them. A water-repellent applied before grouting closes the pores, so building residue comes off without a struggle.
- Apply the adhesive and lay tile by tile. Use a tile adhesive suitable for concrete tiles, spread one area at a time; bed the tiles with a rubber mallet over a board, never directly on the face, and keep a consistent joint of 1 to 2 mm.
- Fill the joints with the right grout. Its colour changes how the pattern reads: grey grout dulls a white and blue design, white grout brightens it. Remove the excess with a damp sponge before it sets.
- Seal and wait. Once the grout is dry, apply the final sealer and allow it to cure before using the area.
The full process, including substrates and adhesives, is in our guide to laying cement tiles. Mistakes that keep cropping up with rugs:
- Ignoring the orientation of the rows in continuous-pattern designs.
- Fitting the border to whatever space is left and ending up cutting the corner pieces.
- Grouting without treating the tiles first, then attacking the cement haze with acid.
- Forgetting the change in level at the adjoining floor until everything has been laid.
Can a cement tile rug cope with kitchens, bathrooms and high-traffic areas?
Yes, and there are tests to back it up. A cement tile is not ceramic: it is a concrete tile, tested to UNE-EN 1339 (the Spanish edition of the European standard EN 1339), not to ceramic standards. Our laboratory test reports are published in full and signed by Elabora, a laboratory listed under number AND-L-155 in the Register of Testing Laboratories of the Junta de Andalucía, the Andalusian regional government.
- Slip resistance. The 20 × 20 cm hydraulic terrazzo achieved a PTV of 59.5 in the wet pendulum test carried out at 20 °C, which corresponds to class 3: the top of the scale, and the class that the Spanish Building Code (CTE) requires in its Basic Document DB-SUA 1 for outdoor areas, swimming pools and showers. It is recorded in test report no. 4718.
- Water absorption. The same hydraulic terrazzo has an average absorption coefficient of 5.9 to 6.2 % under UNE-EN 13748-1. It is a porous material compared with porcelain stoneware, and that is the underlying reason why it is treated with a water-repellent and why it does not tolerate acidic products.
An important caveat: that test was carried out on 20 × 20 cm hydraulic terrazzo, not on every patterned design in the catalogue; if you need test data to back up a specification for a particular format, ask us for its test report. The rest of the care is routine and is covered in our guide to cement tile floor maintenance.
Frequently asked questions about cement tile rugs
What size should a cement tile rug be?
Whatever size results from multiplying whole tiles, plus the width of the border. In the 20 × 20 cm format, a rug of 8 × 12 tiles measures 1.60 × 2.40 m; in 25 × 25 cm, the same number of tiles gives 2.00 × 3.00 m. As a rule of thumb, leave about 40 cm of clear floor between the rug and the wall.
Can a cement tile rug be laid over an existing floor?
Yes, if the existing floor is sound, clean, free of hollow-sounding tiles and properly level, using an adhesive suitable for tiling over ceramic. Bear in mind that tile and adhesive will raise the floor level by 2 to 2.5 cm, which means checking doors, skirting and the junctions with adjoining rooms.
Are there peel-and-stick cement tiles?
No. A real cement tile is a concrete piece 1.5 to 1.8 cm thick, laid with tile adhesive. What is marketed as peel-and-stick cement tiles or self-adhesive cement tile rugs is printed vinyl: a valid option if you don’t want building work, but it is a different product with a different lifespan.
How many tiles do I need for a 2 × 3 metre rug?
Six square metres of field: 96 tiles in the 25 × 25 cm format (16 pcs/m²) or 150 tiles in 20 × 20 cm (25 pcs/m²). On top of that comes the border, which is counted per linear metre of perimeter — 10 m in this example — plus the four corners and around 10 % extra for cuts and spares.
Can I order a rug with an off-catalogue design or colours?
Yes, that is the norm for these compositions: the colour combination is adapted to the project, or the design is developed to order. As each piece is made individually and to order, the lead time is several weeks, so it is best to confirm it with the workshop before planning the building work.
How do you clean a cement tile rug?
Sweep or go over it with a microfibre mop daily, and wash with water and neutral soap. No hydrochloric acid, no descalers and no abrasive scourers: acid attacks the cement and leaves the pattern dull for good. Every so often, renew the water-repellent: it is the real protection against stains.
Once the room is measured, the next step is to choose a pattern and colours from the cement tile catalogue and ask us for samples so you can see them in place, in the room’s own light. At the workshop we have been suggesting combinations like the ones in this article for years: tell us your measurements and the design you have in mind.