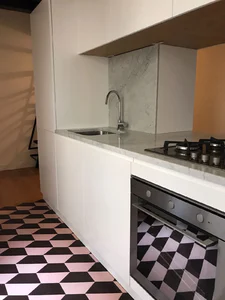
The most common mistakes when specifying cement tiles are treating them like rectified porcelain, demanding ceramic standards that do not apply to them, failing to set the slip resistance class required by the Spanish Building Code (CTE), laying them on a damp or uneven substrate and leaving the adhesive, joint, grout and treatment out of the specification. Almost all of them are put right at design stage, not on site.
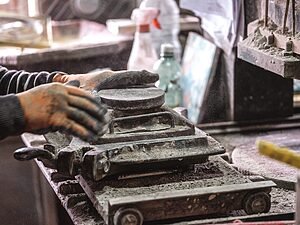
In our workshop in Seville we make our own cement tiles for architecture practices, interior designers and renovation contractors: the problems that reach us are hardly ever down to manufacturing, but to specification. These are the ten that come up most often, and how to rule them out in the project description and the specification.
What are the most common mistakes when specifying cement tiles?
They tend to occur at three stages: drafting the specification clause, accepting the substrate and grouting.
| Specification error | What it causes on site | How to avoid it at design stage |
|---|---|---|
| Treating the tile like rectified porcelain | Joints running out of square and disputes over shade and calibre | 2–3 mm joint and an approved sample panel |
| Asking for ceramic marking and classes | Comparisons between figures that are not comparable | Cite UNE-EN 1339, not UNE-EN 14411 |
| Not setting the slip resistance class | A floor that fails to comply with DB-SUA | Class 1, 2 or 3 per room, backed by a test report |
| Ignoring residual moisture and flatness | Efflorescence, stains and hollow-sounding tiles | Measure moisture and check with a 2 m straightedge before setting out |
| Grey, rigid or spot-bonded adhesive | Shadows on pale tiles and tiles coming loose | White C2TE S1, back-buttering, full coverage |
| Grouting without prior protection | Pigment in the pores and a clouded pattern | Pre-sealing and a staining test on two tiles |
| Measuring in m² without checking the piece count | Material shortfalls and mixed batches | Measure in pieces using the format’s pcs/m² |
| No allowance for wastage or a spare box | Replacements from another batch in a different shade | 10–15 % extra and spares from the same batch |
| Specifying without a tile layout drawing | Slivers of cut tile along the visible perimeter | Axes, rugs, borders and junctions defined |
| Handing over without a maintenance manual | Cleaning with acids, and complaints | Cleaning guide and resealing schedule |
Why shouldn’t cement tiles be specified like porcelain?
Because they are not ceramic. They are not fired: they are wet-pressed and left to set, with a face layer of pigmented cement a few millimetres thick on a mortar body. That changes the applicable standard, the tolerances they can meet and the way they are fixed on site.
Cement tiles and hydraulic terrazzo are concrete tiles and are tested to UNE-EN 1339, the Spanish edition of EN 1339; terrazzo is also tested to UNE-EN 13748-1/2. Zellige and terracotta, on the other hand, are ceramic, and are governed by the UNE-EN ISO 10545 series and UNE-EN 14411. Requiring ceramic marking for a cement tile only leads to delays and impossible comparisons.
Porosity is the second misunderstanding. Our 20×20 cm hydraulic terrazzo returned an average water absorption coefficient of 5.9–6.2 % (UNE-EN 13748-1); porcelain stoneware stays below 0.5 %. It is not a defect: it is the nature of the material, and it determines treatment, grouting and use outdoors.
Besides the model and colour, the project description should state:
- Minimum joint of 2–3 mm. A handmade tile varies in calibre; a butt joint simply puts that variation on show.
- Accepted shade variation between tiles and between batches, as part of the character of the material.
- Supply from a single batch for the whole area, with spares from that same batch.
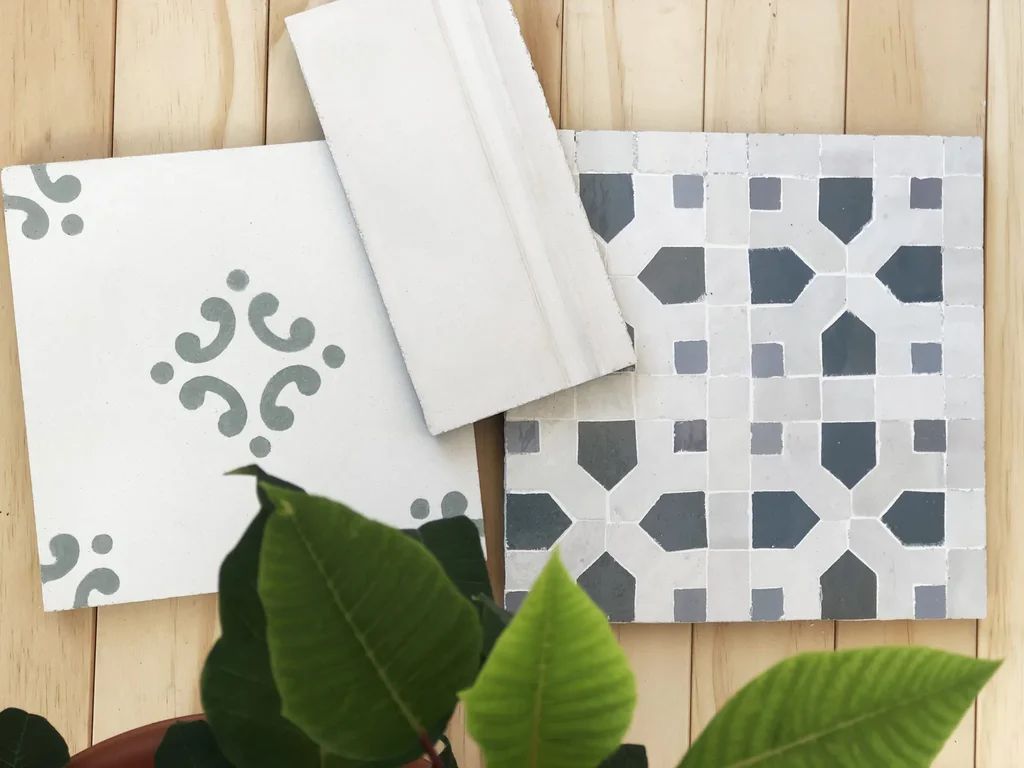
- Sample panel first, 1–2 m² with the intended pattern, joint and sealer, approved by the site architect in daylight, both dry and wet: the sealer darkens the shade, and that change has to be seen before production.
What slip resistance class does the CTE require, and how is compliance demonstrated?
Slip resistance is the only floor property that the Spanish Building Code imposes, in its Basic Document DB-SUA 1. The Rd value is obtained with the friction pendulum test in the Spanish standard UNE 41901:2017 EX and translates into four classes.
| Rd value (PTV) | Class | Where it is required |
|---|---|---|
| Rd ≤ 15 | Class 0 | Not valid anywhere: the CTE requires at least class 1 |
| 15 < Rd ≤ 35 | Class 1 | Dry indoor areas with a slope of less than 6 % |
| 35 < Rd ≤ 45 | Class 2 | Dry indoor areas with a slope of 6 % or more and stairs; wet indoor areas (entrances, bathrooms, kitchens) with a slope of less than 6 % |
| Rd > 45 | Class 3 | Wet indoor areas with a slope of 6 % or more and stairs; outdoor areas, swimming pools and showers |
The usual mistake is to write “non-slip” without a class or a test, or to assume that the same model complies in every room. The class is decided room by room and backed up by a test report. Our 20×20 cm hydraulic terrazzo achieved a PTV of 59.5 in the wet test at 20 °C, with individual values from 55 to 60: class 3, the top of the scale, according to test report no. 4718. We publish the full laboratory test reports, issued by Elabora (listed in the register of the Junta de Andalucía, the Andalusian regional government, under number AND-L-155), so that you can cite them by number to the site architect.
A subtlety that hardly anyone explains: the pendulum needs a sliding area of 124×76 mm, so small tiles have to be tested on a sample that has already been laid. If you require class 3 on a small format, raise it well in advance.
Can cement tiles be specified outdoors, in showers or in swimming pools?
Outdoors, yes, with conditions; under permanent immersion, no. Absorption is the deciding factor: water held in the pores expands as it freezes and breaks the tile from the inside, so in areas with frost the risk is real.
- Courtyards and terraces in mild climates: viable with falls and drainage properly resolved and a water-repellent treatment that is kept up. The criteria are in the guide to cement tiles in courtyards and on terraces.
- Repeated frost or coastal environments: take extra care over the treatment, protect the floor from direct rain (porches, covered galleries) and make clear that periodic maintenance will be needed.
- Showers and bathrooms: fine on floors and walls outside the shower tray; in the shower itself they require class 3, flawless sealing and properly resolved falls.
- Swimming pools and permanently filled basins: ruled out. It is not a material for continuous immersion or constant chlorination.
One more precaution: if the floor will be in full sun all day, check with the workshop how the chosen colour behaves before finalising the colour selection.
What should be checked in the substrate before laying?
The substrate causes more defects than the tile itself. These checks should appear in the specification as acceptance conditions:
- Flatness. A 2 m straightedge, with the usual tolerance of about 3 mm. If it is out, apply self-levelling compound before setting out.
- Residual moisture. Carbide hygrometer (CM method). Adhesive manufacturers usually ask for values of around 2–3 % in a cement screed, and lower with underfloor heating. Trapped water comes out weeks later as efflorescence.
- Screed curing. Laying on fresh mortar is the most frequent cause of salt deposits on the surface.
- Underfloor heating. Commissioned before laying, with gradual start-up and shut-down: the common mistakes when installing cement tiles over underfloor heating are avoided with a schedule, not with a product.
- Structural joints. They are carried through to the finish layer; covering them over guarantees a crack.
- Perimeter joint along every junction with walls, later concealed by the skirting.
- Intermediate movement joints. Bays of around 40 m² indoors and considerably smaller areas outdoors, where temperature swings are greater.
- Dry lay-out of the pattern before fixing, to check centres, cuts and junctions. The details are in our guide on how to lay cement tiles.
Which adhesive, joint and grout should go in the specification?
The complete system, not just the tile: the class of each material and who is responsible for each stage.
- White C2TE S1 adhesive. C2 improved, T reduced slip, E extended open time and S1 deformable. White is non-negotiable under light-coloured tiles: grey shows through and leaves “ghosts”.
- Back-buttering and full contact across the back of the tile. Voids between the adhesive ridges concentrate stress and end up as broken or loose tiles.
- 2–3 mm joint with spacers, never butt-jointed, and grouting only once the adhesive has cured.
- Pre-sealing before grouting and a staining test on two tiles out of sight. Heavily pigmented grouts and epoxy grouts call for even greater care with that protection.
- Fine-grained grout in a controlled shade: the colour of the joint changes how the pattern reads as much as the design itself. For the criteria, see which grout to choose according to the tile colour.
- Water-repellent impregnator or penetrating sealer compatible with pigmented cement, in two coats and observing the curing times.
- Final clean with a pH-neutral product: expressly prohibit acids and degreasers, which attack the cement irreversibly.
How do you measure and order the material without running short?
Cement tiles are measured by the piece, not in rounded-off square metres. The number of pieces per square metre prevents shortfalls; the weight tells you what load you are adding to a floor structure in a refurbishment.
| Format | Ref. | Dimensions | Weight per tile | Pcs/m² | Floor weight |
|---|---|---|---|---|---|
| Square | H02 | 25 × 25 × 1.8 cm | 2.30 kg | 16 | 36.8 kg/m² |
| Square | H03 | 20 × 20 × 1.5 cm | 1.30 kg | 25 | 32.5 kg/m² |
| Square | H04 | 15 × 15 × 1.5 cm | 0.79 kg | 45 | 35.6 kg/m² |
| Square | H06 | 10 × 10 × 1.5 cm | 0.35 kg | 100 | 35.0 kg/m² |
| Rectangular | H11 | 30 × 15 × 1.6 cm | 1.45 kg | 23 | 33.4 kg/m² |
| Hexagonal | H21 | 30 × 20 × 1.7 cm | 1.62 kg | 21 | 34.0 kg/m² |
| Hexagonal | H22 | 23 × 20 × 1.5 cm | 1.16 kg | 29 | 33.6 kg/m² |
| Chakar | H61 | 20 × 17 × 1.5 cm | 0.58 kg | 50 | 29.0 kg/m² |
The weights are for the tile alone: the adhesive and the bedding layer come on top. The full table of cement tile formats includes octagonal tiles, tile inserts and skirting tiles, the latter measured in pieces per linear metre. And if you name a model, link to its product page: the Chakar cement tile is format H61, 50 pieces per square metre, more than twice as many as a 25×25.
- Wastage: an extra 10 % for simple layouts and up to 15 % in irregular rooms with many corners, borders or cut tile rugs.
- Spare box: material from the same batch for future repairs. A replacement from another batch will show.
- Lead times: handmade production needs time for making, setting and drying. Check lead times, minimum orders and availability with the workshop before committing to a delivery date on site.
How do you specify the tile layout and close out the handover to the client?
A geometric pattern only works if it has been set out: the difference between a resolved project and an improvised one lies in the tile layout drawing and the approved sample panel.
From the brief to the layout drawing
Before choosing a pattern, pin down how the space will be lived in: whether there are children or pets, how much maintenance the client is prepared to take on and what feel they are after. That brief decides format, pattern and palette: a neutral base with a vibrant pattern in key areas is not the same as a statement mosaic across the whole room.
On the drawing, define the axes of symmetry, where the cuts fall (always in the least visible area), the junctions with timber or porcelain and the special pieces: borders, skirtings, steps and rugs. The centres of the pattern should line up with where the eye goes: the entrance, the front of the kitchen island, the bathroom mirror. Our guide to the most popular cement tile patterns gives criteria room by room.

Handover documentation
Many problems are not down to manufacturing but to use. Along with the keys, hand over a cleaning and maintenance guide (compatible products, frequency, reapplying the sealer and what to do about a stain), the model reference, the batch number and where the spare box is kept. And break down the cost from the outset: material, adhesive, sealer, specialist labour, transport and special pieces; laying mosaics and borders takes skill, and a budget that only looks at the price per square metre falls short.
Frequently asked questions about specifying cement tiles
What are the drawbacks of a cement tile floor?
It is porous and chemically reactive: it stains if it is not treated and is damaged by acids and strong degreasers. It needs a deformable adhesive, a 2–3 mm joint, a dry substrate and a well-executed initial seal. Shade and calibre vary from tile to tile, and handmade production takes time. In return, it develops a patina as it ages and can be repaired tile by tile.
Can cement tiles be laid on a balcony or terrace?
Yes, in a mild climate, with falls and drainage properly resolved, well-grouted joints and a water-repellent treatment that is kept up. In areas with frequent frost, the water in the pores freezes and can break the tile, so it is best to protect it from direct rain or rule this solution out. For permanent immersion, such as a swimming pool shell, it is not the right material.
Which standard should the specification cite for cement tiles?
UNE-EN 1339 (the Spanish edition of EN 1339), the standard for concrete paving flags; for hydraulic terrazzo, UNE-EN 13748-1/2 is added. Slip resistance is substantiated with the UNE 41901:2017 EX test required by DB-SUA 1 of the CTE. The ceramic standards — UNE-EN ISO 10545 and UNE-EN 14411 — apply to zellige and terracotta, not to cement tiles.
What joint should be left between cement tiles?
Between 2 and 3 mm, with spacers, grouted with fine-grained grout once the adhesive has cured. The joint takes up the variation in calibre inherent in a handmade tile and lets the floor move as a whole. Butt-jointing puts that variation on show and removes the play the floor needs to work with the building.
How much extra material should you order?
An extra 10 % over the measured quantity for simple layouts and up to 15 % with many corners, borders or cut tile rugs. It is also wise to keep back a box from the same batch for future repairs: with a handmade product each batch has its own nuances, and a later replacement will rarely match the original shade.
Are cement tiles non-slip?
It depends on the format, the finish and the test, so it should not be taken for granted. The class is determined with the friction pendulum and backed up by a test report: our 20×20 cm hydraulic terrazzo achieved a PTV of 59.5, class 3, in test report no. 4718. Always ask for the figure for the specific model and format you are going to specify.
If you are finalising a specification clause, start with a physical sample: joint, grout and treatment are decided on the real material. Write to us through the workshop’s contact page with the project, the rooms and the slip resistance class you need, and we will tell you which formats and models are suitable.