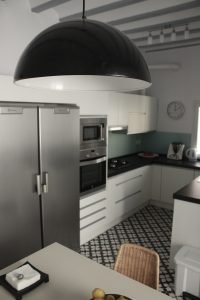
Cement tile designs are the coloured motifs on the visible face of each tile which, when repeated, form the complete pattern of the floor. They are not printed: they are filled in by hand with a paste of white cement, marble powder and pigment inside a brass mould — the divider — and pressed while still wet, so the design has a body and thickness of its own.
That difference determines how many tiles you need to complete a motif, how the room is set out and how far a design of your own can go.
How is the design on a cement tile made?
The design exists before the tile does. In a cement tile, the motif is built up inside a mould: the divider, a brass partition cut to the outline of the design, splits the mould into watertight cells, and each cell is filled by hand with a paste of a different colour.
On top of this face layer — about 3 to 5 millimetres thick — goes an intermediate layer of grey cement and sand and, above that, the base that gives the tile its body. Everything then goes through the hydraulic press, which compacts the three layers into a single block. Hence the name “hydraulic tile”: it sets with water and pressure, without a kiln.
A cement tile is not ceramic. It is not fired: it sets. Cement reaches its reference strength at 28 days, which is why a freshly pressed tile needs weeks of curing before it can be laid. The whole process is explained step by step in our article on how cement tiles are made.
This has two practical consequences. The lines of the design are formed by the brass partitions themselves: they come out crisp, but never identical from one tile to the next, with small variations in line and shade that are part of the product. And the colour is not on the surface: it runs through the whole face layer, so a cement tile design will not rub off.
What types of cement tile design are there?
There are four families: geometric, floral, plain or solid-colour, and finishing pieces. The important difference between them is not aesthetic but compositional: each family needs a different number of tiles to complete the motif and is set out in a different way.
Geometric designs
These are the most requested and the ones that age best: the black and white chequerboard, herringbone, chevron, the diamond, the cross, the octagon with a square insert and the eight-pointed star of the al-Andalus and Mudéjar tradition. They work by tessellation: the shape is repeated, rotated or mirrored until it covers the surface without leaving any gaps.
The format goes hand in hand with the motif. A hexagon or an octagon has geometry built in even when the tile is plain: here, the outline itself creates the design, with two or three alternating colours. You will find more layouts in our guide to the most popular cement tile patterns.
Floral and Art Nouveau designs
Rosettes, leaves, stems and organic shapes inherited from Art Nouveau and its Spanish counterpart, Modernisme — the period when this type of floor was at its height. They are almost always worked as four-tile modules: each tile carries a quarter of the flower, and the motif only appears when all four are laid together.
Plain, solid-colour and chequerboard designs
A tile in a single colour also creates a design, because here the layout does the drawing. With two references from the cement tile colour chart — from MC1 to MC49 — you can build a chequerboard; with three, a diagonal pattern. It is the most understated option and the one that sits best alongside a bold motif in another room. With solid colours, however, variations in shade are more noticeable: there is no design to disguise them.
Borders, skirting and tile inserts
These are the pieces that finish off the composition: the border frames it, the skirting carries the floor up onto the wall and the 7 × 7 cm tile insert is set between larger tiles or into a terracotta floor. Without them, a patterned floor ends in an abrupt cut against the wall. There are ideas for compositions in our article on geometric border tile trends.
How many tiles make up a design, and how many do you need per square metre?
These are two separate things: the module of the design — some motifs are complete on a single tile, while others need 2, 4 or 6 different tiles — and the format, which sets how many units fit into a square metre. Confusing the two is the most common mistake when ordering material. These are the cement tile formats we make:
| Shape | Ref. | Dimensions | Weight per unit | Units / m² |
|---|---|---|---|---|
| Square | H02 | 25 × 25 × 1.8 cm | 2.30 kg | 16 |
| Square | H03 | 20 × 20 × 1.5 cm | 1.30 kg | 25 |
| Square | H04 | 15 × 15 × 1.5 cm | 0.79 kg | 45 |
| Square | H06 | 10 × 10 × 1.5 cm | 0.35 kg | 100 |
| Rectangular | H11 | 30 × 15 × 1.6 cm | 1.45 kg | 23 |
| Rectangular | H13 | 20 × 10 × 1.5 cm | 0.62 kg | 50 |
| Hexagonal | H21 | 30 × 20 × 1.7 cm | 1.62 kg | 21 |
| Hexagonal | H22 | 23 × 20 × 1.5 cm | 1.16 kg | 29 |
| Octagonal | H31 | 20 × 20 × 1.5 cm | 1.14 kg | 25 |
| Chakar | H61 | 20 × 17 × 1.5 cm | 0.58 kg | 50 |
| Tile insert | H07 | 7 × 7 × 1.5 cm | 0.25 kg | 205 |
The full list, including skirting and variants, is on our cement tile formats page. Some tiles are both design and format: the Chakar cement tile, reference H61, has an outline of its own that creates the pattern as the tiles interlock, with no need for a motif on the face.
To work out the order for a patterned floor:
- Identify the module of the motif, that is, how many different tiles are needed for the design to be complete: 1, 2, 4 or 6.
- Measure the actual area and deduct large openings, but not small ones.
- Multiply the square metres by the units per m² of your format: 25 pcs/m² for 20 × 20 cm, 45 pcs/m² for 15 × 15 cm.
- Add a margin for cuts: for patterned floors, around 10% is usually allowed, and a little more if the motif has to be centred.
- Divide the total among the tiles in the module, not always in equal parts: in some motifs, one tile is used twice as often as the others.
- Order all the material at once: because it is made of cement and pigment, two batches made on different dates may not match in shade.
How do you compose a patterned floor?
Just like a rug: a central field with the motif, a border that frames it and, if needed, a plain background around it. That three-part structure stops a bold design from swallowing up the room.
Rugs and borders: guiding the eye
In a kitchen, a rectangle of patterned tiles under the table marks out the dining area without putting up a partition. In an entrance hall, a central field framed by a perimeter border organises movement through the space. And in a bathroom, a half-height geometric dado links the wall with the floor. We look at the idea in more depth in our guide to cement tile rugs.
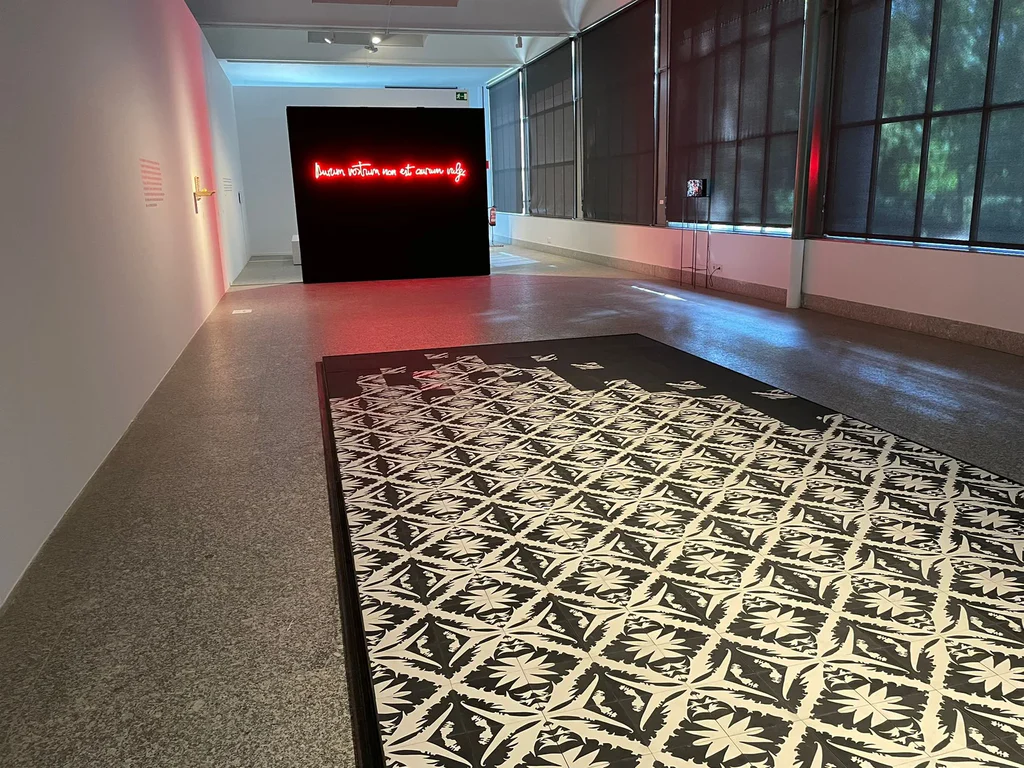
Joints and grout are part of the design too
A joint of about 2 mm is standard for cement tile floors: it takes up the dimensional tolerance of the tiles without breaking the rhythm of the motif. The colour of the grout decides whether the grid shows or disappears: a shade close to the background camouflages it; a contrasting one emphasises it and turns each tile into a framed picture.
And a setting-out rule that is often forgotten: align the axis of the design with a real axis of the room — the doorway, the main window, the line of light fittings. When the centre of the motif coincides with a reference the eye already uses, the floor looks as if it had been designed for that room.
Which design should you choose for each room?
The rule of thumb is one of scale: in small rooms, motifs with a fine repeat work better, as they multiply the pattern and make the space look bigger; in large rooms, designs with more room between the motifs can breathe and do not feel overpowering.
Points worth considering before you decide:
- Size and shape of the room. A narrow corridor calls for a directional pattern (herringbone, aligned diamonds); a square living room can take a centred motif with a border.
- Natural light. Dry-lay the tiles and look at them in daylight and with the artificial lights on: what looks soft in the morning can look dramatic at night.
- Fitted furniture. If a kitchen island, a bath or a wardrobe is going to cover a large part of the floor, a centred motif gets lost; a continuous pattern works better.
- Continuity. If the floor can be seen from another room, decide beforehand whether you want contrast or a transition.
- Colour. High contrast (black and white, indigo blue on cream) emphasises the geometry; analogous tones such as sands, greys and muted greens calm it down.

Do cement tile designs hold up outdoors and in wet areas?
Yes, if the choice is based on two figures rather than on instinct: slip resistance and water absorption. The Spanish Building Code (CTE) only sets requirements for the first, in its Basic Document DB-SUA 1; it is measured with the pendulum friction test described in the Spanish standard UNE 41901:2017 EX.
| Rd value (PTV) | Class | Where the CTE requires it |
|---|---|---|
| Rd ≤ 15 | Class 0 | Not valid anywhere: the CTE requires at least class 1 |
| 15 < Rd ≤ 35 | Class 1 | Dry indoor areas with a slope of less than 6% |
| 35 < Rd ≤ 45 | Class 2 | Dry indoor areas with a slope of 6% or more and stairs; wet indoor areas (entrances, bathrooms, kitchens) with a slope of less than 6% |
| Rd > 45 | Class 3 | Wet indoor areas with a slope of 6% or more and stairs; outdoor areas, swimming pools and showers |
Our 20 × 20 cm hydraulic terrazzo achieved a PTV of 59.5 in the wet test at 20 °C, with individual values from 55 to 60: class 3, the highest level and the one the CTE requires for outdoor areas, swimming pools and showers. This is recorded in test report no. 4718. The cement tile has its own report, no. 9102, for the 200 × 200 × 15 mm format and with UNE-EN 1339:2004 (the Spanish version of EN 1339) as the framework standard; that PTV belongs to the terrazzo, so it is best to ask the workshop for the slip resistance figure for a specific design. We publish the full test reports, not a summary, in case you need to justify the specification item to the architect or site supervisor.
The water absorption of the hydraulic terrazzo was measured at between 5.9 and 6.2% under UNE-EN 13748-1. That is the figure that matters when it comes to frost: water held in the pores expands as it freezes and cracks the tile from the inside. For this reason, outdoors and in wet areas, a cement tile floor is always treated with a water-repellent.
An honest caveat: the pendulum needs a sliding area of 124 × 76 mm, so small tiles have to be tested on a sample that has already been laid, not on a loose tile.
Can you design a custom pattern or reproduce an old one?
Yes. A new design starts with a new divider: the brass partitions that will separate each colour have to be cut and soldered. The limit is not artistic but technical: each colour needs its own cell, and the more cells there are and the finer the lines, the harder they are to fill and the more fragile the mould becomes.
You can start from a sketch, a photograph or an original tile salvaged from a building site: that is what makes it possible to complete an old floor that is missing tiles, or to remake the floor of a listed house with the same motif. The path from idea to mould is described in our article on custom cement tiles; lead times and conditions for a custom run are best discussed with the workshop.
Frequently asked questions about cement tile designs
How many tiles do I need to see the complete design?
As many as the motif’s module requires: some designs are complete on a single tile, while others need 2, 4 or 6 different tiles laid together. In a four-tile module, a single tile on its own only shows a quarter of the design. To judge a design, it is worth seeing a layout of at least four tiles or a photo of the finished floor.
Can different designs be mixed in the same room?
Yes, that is the patchwork effect, and it works on two conditions: all the tiles must be the same format so that the joints line up, and there must be a common thread of colour or intensity. Without that thread, the floor reads like a sample board. A safer approach is to combine a single design with plain tiles in the same colour.
Does the design wear away or rub off with use?
It does not rub off, because it is not printed: the pigment runs through the whole face layer, which is about 3 to 5 millimetres thick. What does happen over the years is that the surface develops a patina and the sheen becomes uneven where people walk most. This is put right with a water-repellent and regular maintenance, without replacing any tiles.
What is the difference between a patterned cement tile and a porcelain tile that imitates it?
A cement tile is a concrete tile: it sets rather than being fired, and it is tested to UNE-EN 1339. Cement-look porcelain is ceramic: it is fired and has the design printed on the surface, with the UNE-EN ISO 10545 series as its reference. Their figures are not comparable: judging a cement tile by the markings of a ceramic tile leads to the wrong conclusions.
How do I draw my own tile design before ordering it?
Start with a grid at the actual format, 20 × 20 or 15 × 15 cm, draw the motif inside a single square and repeat it four times, rotating it by 90° each time. If the lines meet at the edges when it is rotated and mirrored, the pattern joins up. Limit the palette to three or four colours: each colour is a separate cell inside the divider.
Can patterned tiles be used on walls?
Yes. The same floor tiles work as wall cladding for dados, kitchen splashbacks, bars or bedroom headboards, and also as the visible face of furniture and worktops. On walls, weight matters: it ranges from 0.25 kg for a 7 × 7 cm tile insert to 2.30 kg for a 25 × 25 cm tile.
The next step is to see the tile designs in person rather than on a screen, because the colour of a cement tile floor changes with the light in each home. Browse the cement tile catalogue and ask us for samples of the ones you like, so you can dry-lay them on the actual floor.